Wednesday, September 10, 2014

Flashdance flashback

I'm an unapologetic child of the 80's.  I'm also biracial.  Under those circumstances, I had two options for style icons back then: Lisa Bonet or Jennifer Beals.  I was far too young to really dress like either one of them, but let's be honest, in any style competition--Lisa Bonet is the winner.  I mean,  she had eye makeup that looked like Hollywood's sunglasses from the movie Mannequin.  Nevertheless, Jennifer Beals in Flashdance was the quintessential look for the decade.  Like many stay-at-home moms, my look these days is a hilarious farce of athletic wear that is worn to the grocery store or Starbucks, but not ever to work out in, because frankly I don't want to.  It's no mystery why so many moms like this kind of outfit--they wash and wear easily, they are usually figure skimming but not revealing, which makes them forgiving to post-baby bodies, and because you quickly figure out that wearing your other cute stuff is a futile exercise in keeping yourself clean and preserved all day.  While I love making dresses, I really find myself reaching to find occasions to wear them.

In light of all this practicality, and the inescapable influence of my youth, I found myself looking for easy knitwear to make that I would really wear.  I decided to tackle my take on the Flashdance look.  You know the one?

I also wanted an easy project to acquaint myself with my serger, since this would be all knit.
Here's my version... of the shirt AND the picture.  This is how I entertain myself.

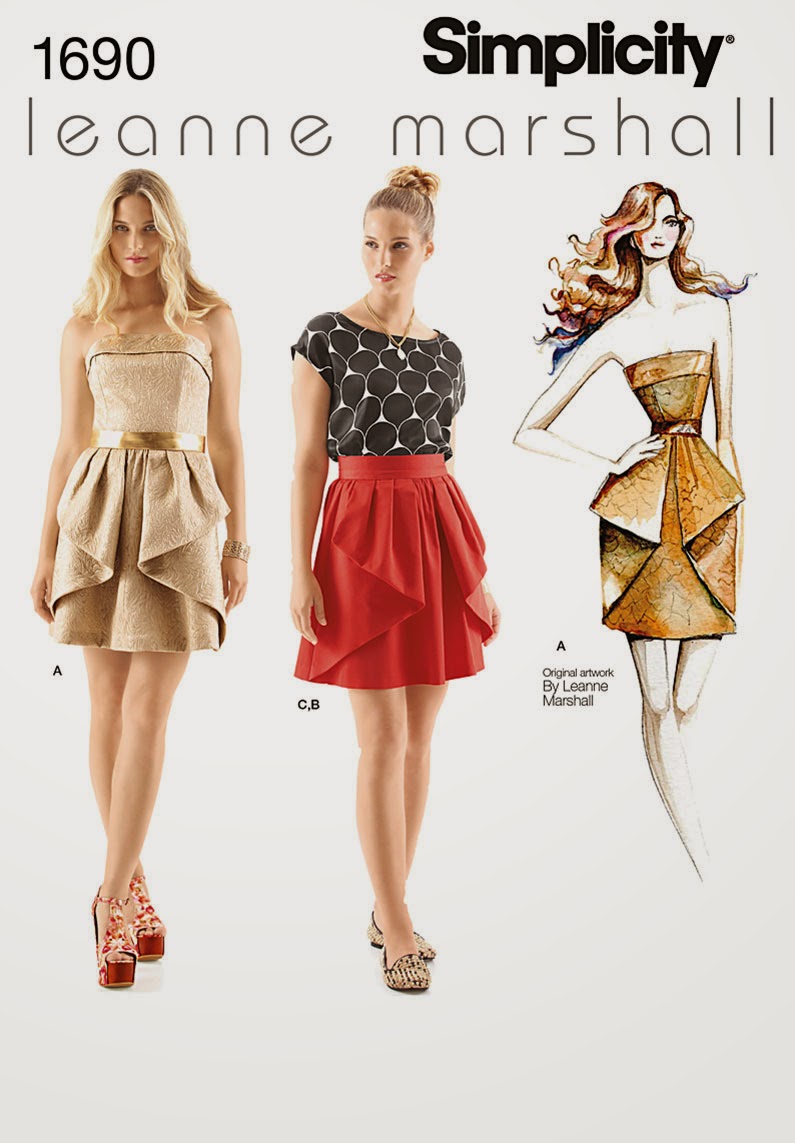
I picked up one yard of a super inexpensive hacci-type heathered grey knit at Hancock. Hacci knit and ITY knits have a really loose weave and are unstable. It probably wasn't the best material to start with, but all the problems with it ended in happy accidents.  I didn't own a pattern, or even see a pattern that had the exact look I was going for, so I drafted this top from another pattern that was close to what I was looking for... Simplicity 1690.
This pattern is not meant for knits, which is important to know because the ease plays a big role in the end fit.  Ease is the difference between your body measurements and the finished garment measurements--the tightness or looseness, if you will.  Knit patterns usually have 0 ease or even negative ease due to the elasticity of the material.  I knew I wanted this extra drapey end fit, so I used the ease included in this shirt pattern.  I wanted a wider neckline, longer (tunic-like) length, and a straighter line on the side seam (obscuring the waistline more), rather than a shaped line.  Using the landmarks on this pattern (like bust point, armhole opening, waistline) I drafted those changes onto a fresh piece of paper.  I'm not exactly comfortable drafting from complete scratch yet, though I make things with the intention of learning how to make them and not just following the directions.

As I mentioned, this fabric was really tricky.  I tried to hem it with a twin needle on my sewing machine, but the hem was all over the place.  It looked like I let my kids take turns chewing on the edge of it... not good.  The solution I came up with for the hem was to make them all cuffs!  I cheated!  To do it, I just measured the length of each edge that required finishing-- the armholes, the neck hole, and the bottom.  Then I cut a length of fabric to each of those lengths.  The width was determined by what I wanted the end cuff width to be.  So, the width would be 2x's the desired cuff width + the seam allowance. So for a 1 inch cuff with a 1/2 inch seam allowance, you would cut the fabric 3 inches wide.  The benefit to doing a cuff was that I could use my serger for the entire thing.  I think it finished well too...


So, I love this shirt.  Its comfy.  Its semi-stylish.  It took only a yard of fabric, and I know I'll wear it.  In my mind I am indeed a maniac, maniac on the floor.

And I'm grocery shopping like I've never grocery shopped before.

Wednesday, September 3, 2014

Copycat separates

I'm sincerely obsessed with Modcloth.  I love their extended sizes and retro-inspired looks.  I find more often than not, however, that some of things I love most are out of my price range.  Such is the case with this Essential Elegance skirt.  I was feeling a desperate need for one in white.  It seemed silly to pay $70 for a simple circle skirt, so I decided to make my own.

Because the construction was so basic, I chose to use a circle skirt calculator I found online in lieu of a pattern.  You could also just calculate the measurements yourself, but I feel obligated to tell you that I have an art degree, and that happens to be incompatible with math.  After all, figuring out these measurements requires pi, and not of the fruit or cream variety, so I passed on that.  Using the link I provided, you just plug in your waist measurement, desired skirt length, and fabric width, and it will generate a graphic that shows you the cutting layout.  Since I was copying the Modcloth skirt, I added a substantial waistband (reinforced with interfacing), a side zip, and created it with two layers of a bottom weight white twill.
Circle skirts can be difficult to hem, and rather than fussing with easing the edges under, I chose to finish both layers with a double fold bias tape.  I have a serger now, so if I make another one I may try a rolled edge hem.  With about 1.5 yards of white twill, a 9 inch zipper, and 3 packages of double fold bias tape, this skirt set me back about $20.00.  Sweet!  I would love to make another (couple) (hundred) circle skirt(s) with an elastic waist.  I would also love to make some 3/4 or 1/2 circle skirts for everyday wear.  The cutting layout is similar to the full circle, but with the obvious adjustments of removing portions of the circle to reduce the circumference.

The shirt here was from a Leanne Marshall Simplicity pattern--1690.
The only adjustment I made was to grade the sides a bit bigger at the bust.  I really like the shape of this shirt.  I bought the fabric in the fabric district in downtown Chicago this spring at Vogue.  They had an entire room of polyester prints for $2 a yard!  That room would have been in trouble if anyone ever lit a match. Because of the finicky nature of that silky, chiffony polyester, and my previous lack of a serger, I finished this shirt with french seams.  If you are unfamiliar with french seams, it is a construction technique that involves sewing the garment wrong sides together first, then flipping inside out and sewing it right sides together.  This technique encases the raw edges inside the seam, and for fabric with a propensity for fraying, it can prolong the life of your garment considerably.  Here is Professor Pincushion's video tutorial for french seaming.

I am very happy with these pieces.  It is nice to make separates sometimes... it makes it easier to incorporate your handmade items into your everyday wardrobe when a dress isn't always appropriate.  For me and my life, knitwear would be even more useful.  I plan to tackle that next!